How to Screed a Floor
Screeding a floor is an essential step in ensuring a smooth, level surface for your final flooring. Whether you’re preparing a base for tiles, wood, or vinyl, proper screeding is key to achieving a professional finish.
The floor screeding process is a highly technical one that requires meticulous attention to detail. Here at GM Floor Screeds, we’ve been preparing final floor finishes with professional screeds for over 20 years.
We’ve seen what poor floor screeding can do if the right steps aren’t followed. Improperly layering screed can lead to cracks, uneven surfaces, and potential costly repairs. It’s therefore essential to follow the step by step guide provided below if you’re to undertake floor screeding yourself.
In this guide, we’ll walk you through step-by-step, and answer common questions to help you get the very best results.
Tools & Materials Needed
Before you begin, you’ll need the following tools and equipment to get started:
- Screed board or straightedge (aluminum or wood)
- Spirit level
- Trowel
- Bucket or mixing tub
- Power drill with a mixing paddle (for self-leveling compounds)
- Concrete float
- Broom or brush
- Protective gloves & goggles
How to Screed a Floor: Step by Step Guide
1. Prepare the Floor
Start by removing any debris, dust, or loose material. Ensure the subfloor is also clean and free of oil or grease. If applying screed over concrete, dampen the surface slightly or use a bonding agent for better adhesion. Learn more about the importance of floor preparation.
2. Mix the Screed
For traditional screed (sand and cement mix), use a 4:1 ratio (sand to cement) with water until it reaches a firm but workable consistency. For self-leveling screed, follow the manufacturer’s instructions carefully.
3. Set Leveling Guides
Use wooden battens, rails, or leveling pegs to mark the desired height. Check the levels with a spirit level to ensure even application.
4. Divide up the Flooring Area
Next you’ll need to divide your floor into sections. This ensures an even and systematic application. At GM Floor Screeds, we use our own dividers, but you can also use straight wooden battens cut to the height you wish to screed. These guides help you maintain an even screed depth throughout the process.
Professional Tip: Ensure the battens are level before applying to prevent inconsistencies.
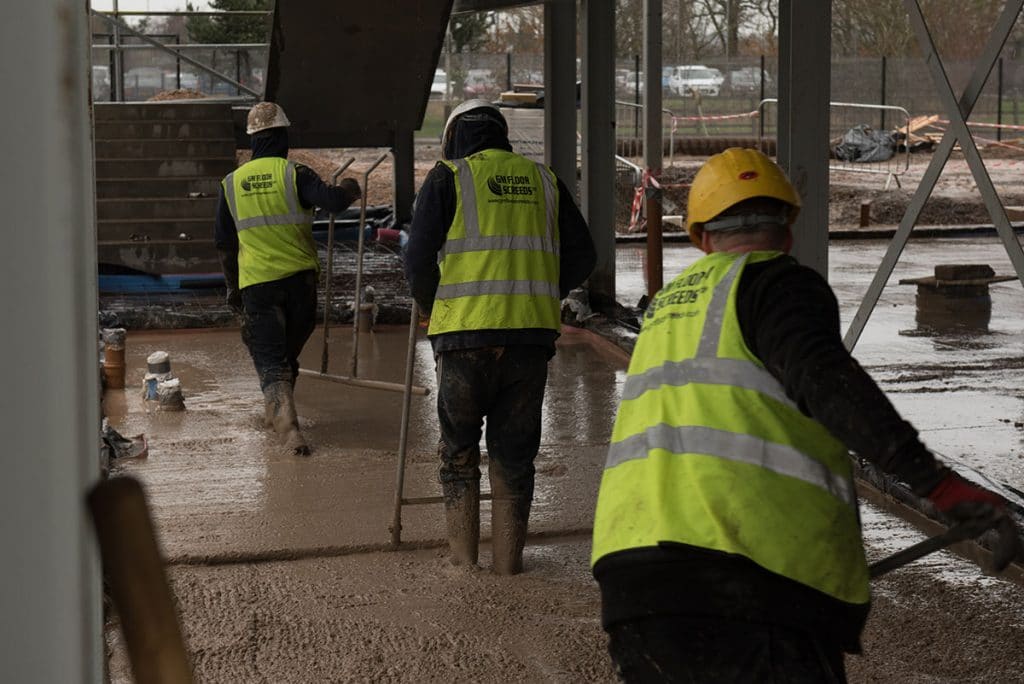
5. Apply the Screed
Start by applying the mix to the section furthest from the entrance. Work methodically, pushing and spreading the screed to ensure full coverage. Compacting the screed properly is crucial for achieving a strong and durable floor.
Risk of DIY: If not properly compacted, air pockets can weaken the floor, leading to cracks and an unstable surface.

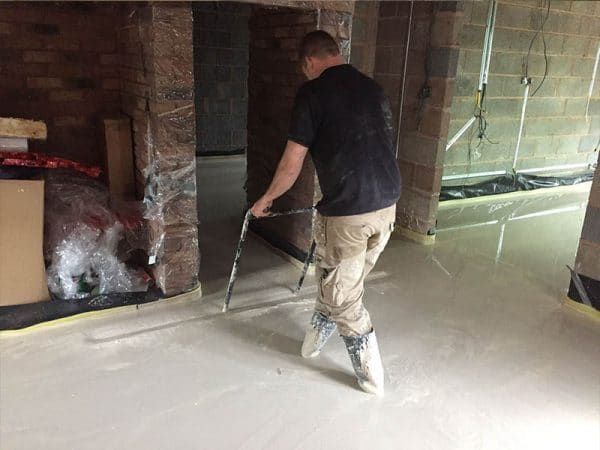
6. Level the Screed
If you are not using a self-levelling option, you will need to level the floor manually. A trowel, a straightedge, or a long, straight piece of wood is essential for this task. Move the straightedge across the screed in a sawing motion to achieve a flat surface.
Once you’ve leveled the concrete with a straightedge or alternative, use a float to smooth out ridges and fill any low spots.
Professional Tip: A laser level can provide greater accuracy, ensuring a truly even floor.
7. Repeat the Process
Continue filling and levelling each section until the entire floor is covered. Once all sections are completed, remove any temporary battens and fill in the gaps.
Risk of DIY: If you do not work quickly enough, the screed may start setting before you finish, leading to an uneven surface that cannot be fixed easily.
8. Cure the Screed
Once all the above has been carried out, the floor must be left to cure. The average curing time for traditional screed is around 7 days, but this may vary based on temperature and humidity levels. Read our full breakdown of how long it takes different screeds to dry.
Professional Tip: Avoid walking on the screed before it has fully cured. To prevent cracks, cover the screed with plastic sheeting to retain moisture and ensure even drying.
Can I Screed a Floor Myself?
Yes, you can screed a floor yourself, but it requires precision and patience. Here are a few things to consider before taking on the job:
- Experience Matters – If you have no prior experience, hiring professionals like GM Floor Screeds can save time and ensure a flawless finish.
- Proper Tools Required – The job requires specialised tools such as a straightedge, float, and spirit level.
- Surface Preparation is Key – A poorly prepared base can lead to cracks and uneven surfaces.
If you’re unsure, it’s always best to consult professionals to avoid costly mistakes.
Can I Screed Over Concrete?
Yes, you can screed over concrete, but you need to take the right steps to ensure adhesion and longevity.
How to Screed Over Concrete:
- Clean the Surface – Remove dust, grease, and loose particles.
- Apply a Bonding Agent – Use a PVA or primer to enhance adhesion.
- Check the Level – If the concrete is uneven, consider using a self-leveling alternative.
- Apply Screed – Follow the same process outlined above.
Screeding over concrete can create a smoother and more even surface, making it ideal for final floor coverings.
Should I Hire a Screeding Company?
While it may be tempting to screed a floor yourself, professional screeding companies have the expertise, equipment, and materials to guarantee a smooth, level, and durable floor.
Servicing Birmingham and the wider West Midlands, GM Floor Screeds have grown to become one of the leading screed companies in the UK, delivering perfection first time, every time, for clients across both commercial and domestic sectors.
Here are the key benefits of hiring professionals:
- Precise levelling: Professionals use laser-guided tools for a flawless finish.
- Stronger, longer-lasting results: Properly compacted screed reduces the risk of cracking and structural weakness.
- Time efficiency: Professionals can complete the job faster and more effectively than DIY attempts.
- Reduced waste: Experts know exactly how much material to use, saving you money on excess materials.
- Avoid costly mistakes: Fixing an uneven or cracked screed is expensive and time-consuming.
Contact the Professionals Today
Screeding a floor may seem straightforward, but without the proper skills and tools, it can lead to serious issues that compromise the integrity of your flooring. Hiring a professional company ensures a flawless finish, eliminates risks, and saves you time and money in the long run.
So if you’re in need of expert services, contact a trusted provider to get the best results for your flooring project. GM Floor Screeds have many years in installing high-quality, cost-effective floor screeds. Contact us today by filling out our online contact form or by calling us on 01543 572 177.
Popular FAQs
1. What is the best type of screed to use?
The best type of screed depends on the project. Traditional sand and cement screed is common for general applications, while self-levelling screed is ideal for a quicker and more precise finish. If you need fast-drying screed, opt for calcium sulfate-based screed.
2. How thick should floor screed be?
The thickness of screed depends on its application. Standard screed thickness is between 50mm and 75mm, but for underfloor heating, a minimum of 65mm is recommended.
3. How do I prevent cracks in my screed?
To prevent cracks, ensure the screed is properly compacted, avoid excessive water in the mix, and allow for proper curing. Using a professional screeding company significantly reduces the risk of cracks.
4. Can I screed over existing flooring?
Yes, but the surface must be prepared correctly. This includes cleaning, priming, and sometimes applying a bonding agent to ensure proper adhesion.
5. How long before I can lay flooring on top of the screed?
The drying time varies depending on the screed type. Traditional screed takes around 28 days to dry fully, while fast-drying screeds can be ready in as little as 24–48 hours.